Paint Your Own Cookies offer a delightful blend of creativity and deliciousness, transforming simple treats into edible masterpieces for all ages to enjoy.
These innovative cookies have surged in popularity, providing a unique and engaging activity, especially during festive seasons and as a fun family pastime.
DIY kits simplify the process, allowing even busy parents to participate in holiday traditions, while supporting local businesses adds extra sweetness to the experience.
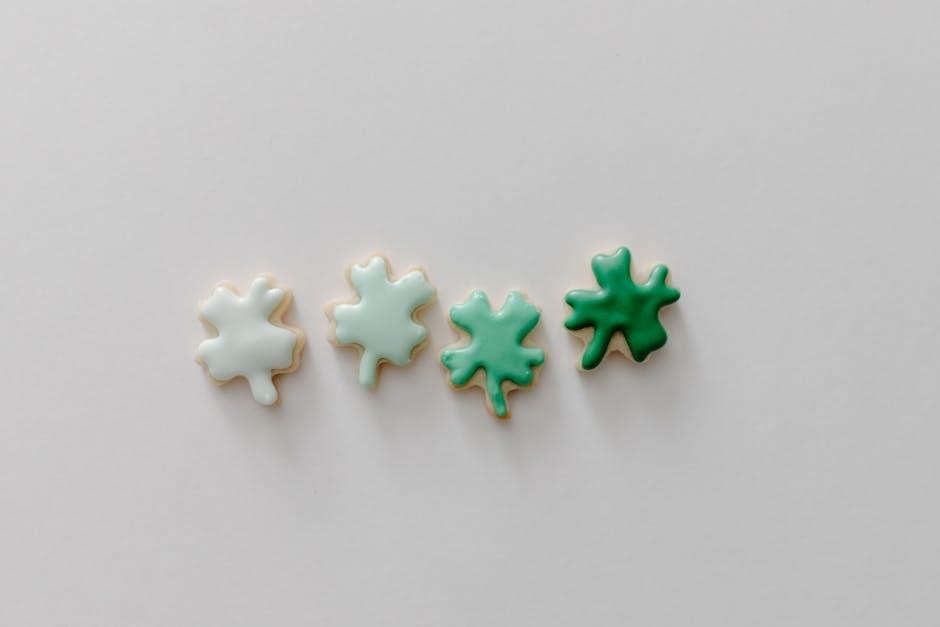
As autumn arrives, these cookies capture the magical spirit of the season, offering a creative outlet and a tasty treat to brighten the changing leaves.
From online retailers to local bakeries, Paint Your Own Cookies are readily available, making artistic expression accessible and incredibly enjoyable for everyone involved;
What are Paint Your Own Cookies?
Paint Your Own Cookies are essentially sugar cookies that come pre-iced with a smooth, white base – typically royal icing – specifically designed to act as a canvas for edible art. Unlike traditionally decorated cookies, the focus shifts from intricate piping to a more freeform, painting-style approach.
These cookies aren’t about achieving perfect lines or complex designs; they’re about unleashing creativity! They come with small, food-safe palettes of vibrant gel food colors and fine-tipped brushes, allowing users to “paint” directly onto the icing.
Kits are readily available, simplifying the process and making it accessible for all skill levels. They offer a unique, interactive experience, transforming a simple cookie into a personalized edible creation, perfect for holidays or family fun.
Why are They Popular?
Paint Your Own Cookies have exploded in popularity due to their unique blend of artistic expression and deliciousness, offering an engaging activity for all ages. They provide a welcome escape, especially during busy seasons like the holidays, allowing families to connect creatively.
DIY kits are a major draw, simplifying the process for parents juggling multiple commitments, even during lockdowns or hectic schedules. Supporting local businesses by purchasing these kits adds another layer of appeal.
The cookies offer a stress-free decorating experience, removing the pressure of perfect piping and embracing individual artistic flair. They truly capture the magical spirit of fall and the festive season!
Materials You’ll Need
Successful cookie painting requires specific supplies: cookie bases, royal icing, food coloring, varied paintbrushes, water dishes, and palettes for mixing vibrant hues.
Cookie Base Options
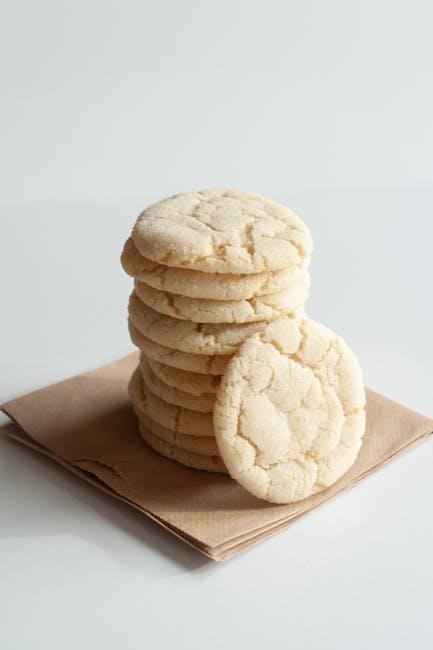
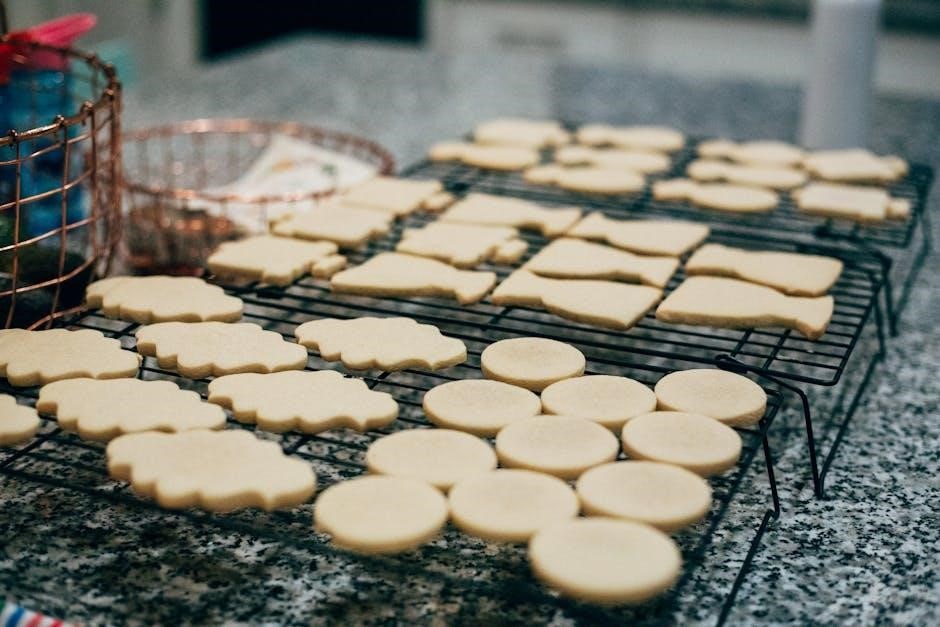
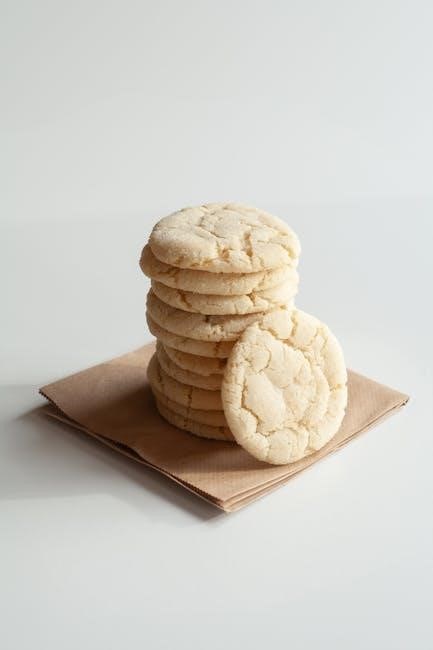
Choosing the right cookie base is crucial for a delightful painting experience. Sugar cookies are the most popular choice due to their flat surface and neutral flavor, providing an ideal canvas for artistic expression.
However, gingerbread cookies offer a festive spice, while shortbread provides a buttery richness. Pre-made cookie kits often include perfectly baked cookies, simplifying the process for beginners.
Alternatively, you can bake your own, ensuring freshness and control over ingredients. Consider the cookie’s thickness; a slightly thicker base provides better support for the icing and painted details. Regardless of your selection, ensure the cookies are completely cooled before applying any icing or paint!
Royal Icing Preparation
Royal icing forms the perfect “paint” for your cookies! It’s made from powdered sugar, meringue powder, and water, creating a smooth, opaque base. Begin by whisking the meringue powder and powdered sugar, then gradually add water until you achieve a toothpaste-like consistency.
For outlining, a thicker consistency is needed; add more powdered sugar. For flooding, thin the icing with water, drop by drop, until it flows smoothly but doesn’t disappear into the cookie.
Proper preparation is key – ensure all ingredients are fresh and the icing is free of lumps. A stand mixer simplifies the process, but a hand mixer works well too!
Food Coloring Selection
Choosing the right food coloring is crucial for vibrant cookie art! Gel food colors are highly recommended over liquid, as they provide intense color without altering the icing’s consistency. A little gel color goes a long way, so start with a tiny drop and gradually add more to reach your desired shade.
Explore a wide range of colors – primary hues, pastels, metallics, and even specialty shades. Consider a set with a variety of options to unleash your creativity.
Ensure your colors are food-grade and compatible with royal icing for safe and beautiful results!
Paintbrushes – Sizes and Types
Selecting the appropriate paintbrushes elevates your cookie decorating! A variety pack is ideal, offering versatility for different techniques. Round brushes, in sizes 000 to 4, are perfect for fine details and outlining.
Flat brushes, ranging from 1/4 inch to 1/2 inch, excel at filling larger areas and creating smooth base coats. Angle brushes are useful for creating precise lines and shaping designs.
Opt for brushes specifically designed for food decorating, ensuring they are made with food-safe materials. Soft bristles are essential for gentle application and preventing icing damage.
Water Dishes & Palettes
Essential tools for seamless painting are readily available! Several small dishes of clean water are crucial for diluting icing to achieve desired consistencies and for rinsing brushes between colors.
A palette, such as a ceramic plate or a plastic palette with wells, is invaluable for holding and mixing your colored royal icing. This prevents cross-contamination and allows for custom shade creation.
Consider using multiple palettes for different color families to maintain vibrancy. Disposable palettes simplify cleanup, while ceramic palettes are reusable and easy to sanitize.
Step-by-Step Instructions
Embark on a sweet artistic journey! From baking the perfect cookie base to adding delightful details, follow these steps for a fun, creative experience.
Baking the Cookies
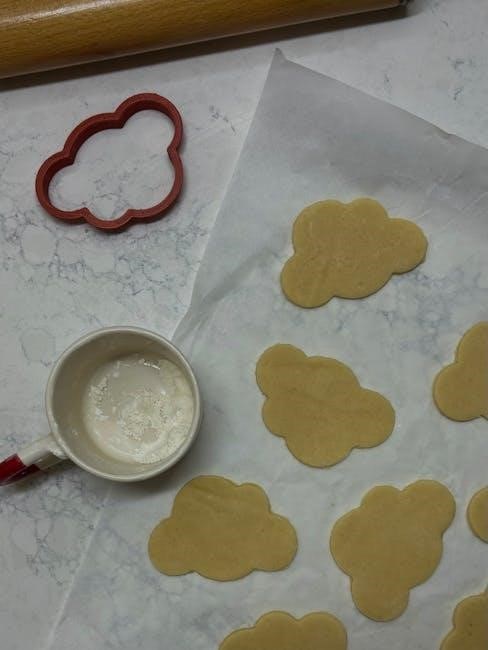
Begin with a solid foundation! For optimal painting, use a firm, flat cookie – sugar cookies are ideal. Prepare your favorite sugar cookie dough recipe, or utilize a store-bought alternative for convenience. Roll the dough to approximately ¼ inch thickness, ensuring evenness for consistent icing application.
Cut out desired shapes using cookie cutters; simple forms work best for beginners. Bake according to your recipe’s instructions, typically around 8-10 minutes at 350°F (175°C). Crucially, avoid overbaking! Slightly softer cookies are easier to decorate.
Once baked, allow the cookies to cool completely on a wire rack before proceeding to the icing stage. A completely cooled surface prevents the icing from melting and ensures a smooth, paintable canvas.
Preparing the Royal Icing
Royal icing is the cornerstone of paint-your-own cookies, providing a smooth, edible canvas. Begin with powdered sugar – approximately 4 cups – and gradually add 3 tablespoons of meringue powder. Meringue powder stabilizes the icing and gives it a beautiful sheen.
Slowly incorporate warm water, about ½ cup, while mixing on low speed. Increase speed and beat for 5-7 minutes until stiff peaks form. The consistency should be similar to toothpaste.
Proper consistency is key! Add water, a tiny amount at a time, to adjust the icing’s thickness for outlining and flooding. A thinner consistency is needed for flooding, while a thicker one is best for detailed work.
Dividing and Coloring the Icing
Once your royal icing is prepared, divide it into separate bowls – one for each color you desire. Gel food coloring is highly recommended as it provides vibrant hues without altering the icing’s consistency, unlike liquid food coloring.
Start with a small drop of gel color and mix thoroughly. Add more gradually until you achieve your desired shade. Remember, colors will deepen as the icing sits, so err on the side of lighter shades initially.
Consistent coloring is important for a polished look. Use a consistent amount of gel color for each batch, or mix colors carefully to match. Cover bowls with damp cloths to prevent crusting while working.
Outlining the Cookie Designs
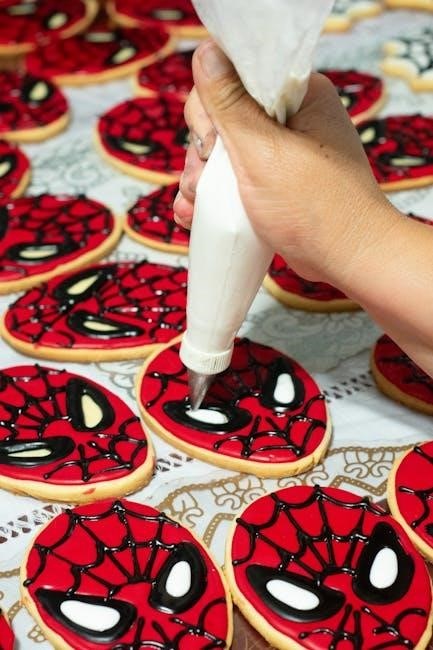
With your colored icing ready, begin outlining your cookie designs. Fit a piping bag with a fine tip – a #2 or #3 is ideal for detailed work. This creates a barrier, preventing colors from bleeding during flooding.
Gently squeeze the bag, guiding the icing to trace your desired pattern. Consistent pressure is key for uniform lines. Practice on parchment paper first to get a feel for the piping bag.
Allow the outline to dry slightly – about 15-20 minutes – before proceeding to the flooding stage. This prevents colors from merging and ensures clean, defined designs. Patience is crucial for a professional finish!
Flooding the Cookie Designs
Once the outline is set, it’s time to ‘flood’ the cookie with icing. Switch to a slightly larger piping tip, like a #5 or #6. This allows for quicker coverage of larger areas.
Fill the piping bag with your thinned icing – it should have a honey-like consistency. Gently squeeze the bag, filling the outlined areas. Use a toothpick or scribe tool to spread the icing evenly and pop any air bubbles.
Work quickly but carefully, ensuring the icing stays within the outlined borders. Allow the flooded icing to dry completely – ideally overnight – before adding further details or painting.
Letting the Icing Dry
Patience is key! Allowing the flooded icing to dry completely is crucial for a successful paint-your-own-cookie experience. Resist the urge to rush this step, as wet icing will smudge and ruin your painted designs.
Generally, the icing needs at least 6-8 hours to set, but overnight drying is highly recommended. A cool, dry environment will expedite the process. Avoid placing the cookies in direct sunlight or near a heat source.
Properly dried icing provides a smooth, stable surface for painting, preventing colors from bleeding and ensuring crisp, clean lines. Once dry, your cookies are ready for artistic expression!
Painting Techniques
Unleash your creativity! Employ basic brushstrokes, intricate details, and water blending to achieve stunning effects on your cookie canvases, adding sprinkles for flair.
Basic Brushstrokes
Mastering fundamental brushstrokes is key to successful cookie painting. Begin with a light touch, allowing the paintbrush to gently glide across the royal icing surface.
Experiment with different brush pressures to vary line thickness – a firmer press creates bolder lines, while a delicate touch yields finer details.
Practice creating straight lines, curves, and dots to build confidence and control. Utilize a round brush for precise work and a flat brush for broader strokes.
Remember to frequently rinse your brush in clean water to prevent color contamination and maintain a smooth, consistent flow of icing paint.
Don’t be afraid to layer colors gradually, building up intensity and dimension with each stroke – patience is a virtue!
Creating Details with Icing
Elevate your cookie art by focusing on intricate details. Utilize fine-tipped brushes for precise linework, outlining shapes and adding delicate features to your designs.
Employ the “dotting” technique to create textures, patterns, or charming embellishments like eyes or flower centers. A toothpick can also serve as a useful detailing tool.
Layering different icing colors allows for shading and highlighting, adding depth and dimension to your creations. Practice blending colors subtly for a seamless effect.
Don’t hesitate to experiment with edible markers for ultra-fine details that brushes may struggle to achieve. Remember, small details make a big impact!
Patience and a steady hand are crucial when adding these finishing touches – take your time and enjoy the process.
Using Water to Blend Colors
Achieving seamless color transitions on your cookies is easily done with a touch of water. Dip a clean brush into water and gently blend the edges of two adjacent icing colors.
Start with a very small amount of water – too much can dilute the icing and cause it to run. Work quickly, as the icing will set as it dries.
For a softer, watercolor effect, lightly dampen the cookie surface before applying the icing. This allows the colors to meld more naturally.

Use a palette to mix small amounts of water with your icing for custom shades and gradients. Experiment to find the perfect consistency.
Remember, blending is about subtlety; aim for a harmonious transition rather than a harsh line.
Adding Sprinkles and Edible Glitter
Elevate your cookie designs with the whimsical charm of sprinkles and the dazzling sparkle of edible glitter! Apply these embellishments before the royal icing fully sets, allowing them to adhere properly.
For controlled sprinkle placement, use a spoon or your fingertips. Gently press the sprinkles into the wet icing. Consider color coordination for a polished look.
Edible glitter can be brushed on with a dry brush, creating a shimmering effect. A light touch is key – too much can overwhelm the design.
Experiment with different sprinkle shapes and glitter colors to achieve unique textures and visual interest.
These finishing touches transform your cookies into truly magical creations!
Design Ideas & Inspiration
Unleash your creativity! Explore holiday themes, beloved characters, or abstract patterns to personalize your cookies, making each one a unique and delightful work of art.
Holiday-Themed Designs
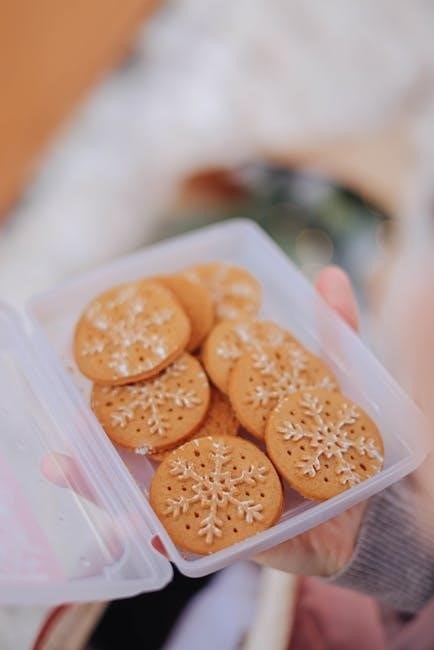
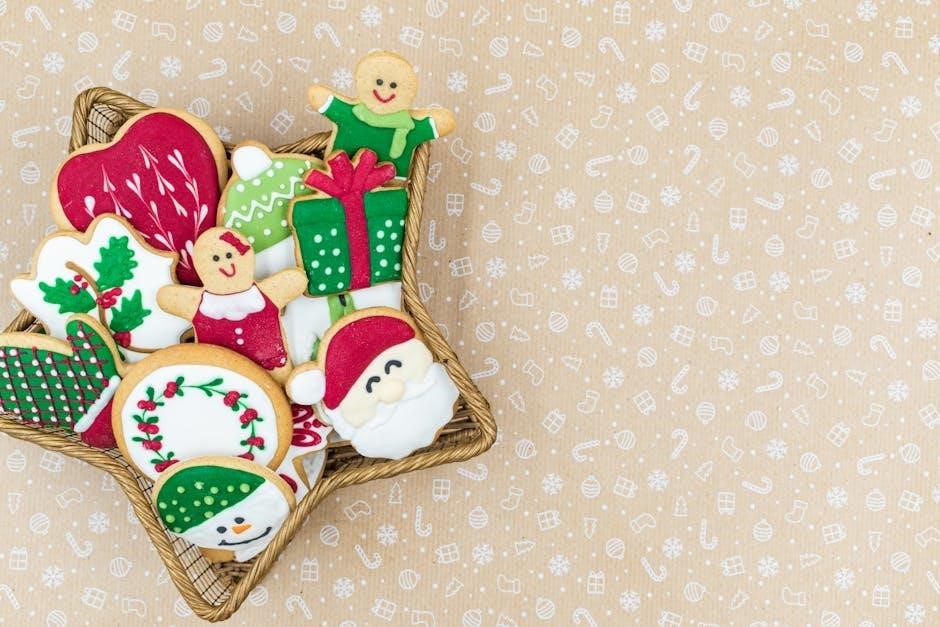
Embrace the spirit of the season! Holiday-themed designs are incredibly popular for Paint Your Own Cookies, offering a festive and engaging activity for all ages. Think classic Christmas motifs like snowflakes, ornaments, and Santa Claus, brought to life with vibrant colors.
For Easter, pastel shades and bunny shapes create adorable treats. Thanksgiving calls for autumnal leaves, turkeys, and pumpkins. Don’t be afraid to get creative with Hanukkah designs, incorporating menorahs and dreidels.
These designs perfectly capture the magic of each holiday, making them ideal for gifting, parties, or simply enjoying a sweet treat while celebrating special moments with loved ones.
Character-Based Designs
Bring your favorite characters to life! Character-based designs are a huge hit with Paint Your Own Cookies, especially among children. Popular choices include beloved cartoon characters, superheroes, and fairytale figures.
Consider recreating iconic looks with careful brushstrokes and vibrant colors. Simple shapes can easily be transformed into recognizable faces and outfits. Encourage creativity by letting kids choose their own characters and design interpretations.
These cookies offer a fun way to combine artistic expression with a love for storytelling. They’re perfect for birthday parties, themed events, or simply a delightful treat for fans of all ages.
Abstract and Geometric Patterns
Unleash your creativity with non-representational art! Abstract and geometric patterns offer a fantastic avenue for artistic exploration on Paint Your Own Cookies, moving beyond recognizable images.
Experiment with bold color combinations, intricate line work, and various shapes like triangles, squares, and circles. Don’t be afraid to embrace asymmetry and unexpected designs. This style is perfect for those who enjoy modern art or want a unique, contemporary look.
These designs are surprisingly easy to execute and allow for a lot of personal expression. They’re a great option for all skill levels, fostering imagination and artistic confidence.
Tips for Success
Maintain icing consistency by adding tiny amounts of water, preventing crusting and ensuring smooth surfaces for detailed designs and a delightful experience!
Preventing Icing from Crusting
Royal icing can quickly develop a crust when exposed to air, making it difficult to blend colors or achieve smooth finishes. To combat this, consistently cover your icing bowls and palettes with a damp paper towel or plastic wrap pressed directly onto the surface.
This creates a humid environment, slowing down the drying process. Regularly misting the icing with a very fine spray of water can also help maintain its pliability. When working with smaller portions of icing, keep them in airtight containers for extended periods.
Remember to stir the icing gently before each use to re-incorporate any slight thickening that may have occurred, ensuring a consistently workable texture for your artistic endeavors.
Achieving Smooth Icing Surfaces
Creating flawlessly smooth icing requires a bit of technique. After flooding a cookie section with icing, gently tap the cookie on the counter several times to release any trapped air bubbles and encourage even distribution.
Use a scribe tool or toothpick to guide the icing into corners and pop any remaining bubbles. For a truly polished look, lightly run a clean, damp brush over the surface of the wet icing, smoothing out imperfections.
Avoid overworking the icing, as this can introduce more bubbles. Patience is key – allow each layer to dry slightly before adding details, ensuring a pristine canvas for your designs.
Troubleshooting Common Issues
Icing crusting over? Quickly add a tiny drop of water and gently stir to restore its consistency. Colors muddying? Ensure your brushes are thoroughly cleaned between each color to prevent cross-contamination.
Icing spreading too thin? Your icing may be too runny; add a small amount of powdered sugar. Bubbles appearing? Gently tap the cookie or use a scribe tool to release them.
Remember, practice makes perfect! Don’t be discouraged by initial imperfections; embrace the learning process and enjoy the creative journey of decorating your Paint Your Own Cookies.

Where to Buy Paint Your Own Cookie Kits
Paint Your Own Cookie Kits are widely available online through major retailers and local bakeries, offering convenient options for creative fun and support!
Online Retailers
Numerous online retailers offer a vast selection of Paint Your Own Cookie Kits, providing convenience and a wide range of choices for customers. Platforms like Amazon and Etsy feature kits from various bakers and suppliers, catering to different themes and preferences.
These online stores often showcase detailed product descriptions, customer reviews, and high-quality images, aiding in informed purchasing decisions. Shipping options are generally flexible, allowing for delivery directly to your doorstep.
Furthermore, online retailers frequently offer seasonal promotions and discounts, making these kits even more accessible. Exploring these platforms provides a convenient way to discover unique designs and support small businesses simultaneously.
Local Bakeries & Shops
Supporting local bakeries and shops when purchasing Paint Your Own Cookie Kits offers a personalized experience and contributes to your community’s economy. These establishments often provide freshly baked cookies and meticulously crafted icing, ensuring superior quality.
Visiting a local bakery allows you to interact directly with the bakers, discuss customization options, and gain valuable tips for successful decorating. They may also offer unique designs not found in larger retail chains.
Purchasing locally fosters a connection with the artisan behind the product, adding a special touch to your creative activity. It’s a win-win, enjoying a delightful treat while bolstering local businesses!
DIY Kit Components
Paint Your Own Cookie Kits typically include everything needed for a fun and creative experience. Expect pre-baked cookies, often sugar cookies, providing a perfect canvas for your artistry. The kits also feature royal icing, usually white, ready for coloring.
A selection of vibrant food colorings is essential, allowing for a wide range of shades and hues. You’ll also find small paintbrushes, varying in size for detailed work and broader strokes.
Many kits include sprinkles and edible glitter for added sparkle and texture. These components simplify the process, making it accessible for all skill levels and ages, fostering joyful creativity!
Safety Considerations
Always be mindful of potential food allergies when selecting kits and ingredients. Supervise children closely during decorating to ensure safe handling of small parts and edible materials.
Food Allergies
Carefully review ingredient lists on all components of the paint your own cookie kit, including the cookies themselves, the royal icing, and the food coloring. Common allergens like wheat, dairy, eggs, and nuts are frequently present.
Consider the potential for cross-contamination during production, even if a product is labeled “allergen-free.” Manufacturers may process items in facilities that also handle allergens.
Communicate openly with anyone participating in the activity about any dietary restrictions or allergies they may have. Offer alternative options if necessary, such as gluten-free cookies or vegan icing.
Be particularly cautious when purchasing kits from smaller bakeries or online sources, as ingredient transparency may be limited. Always inquire about allergen information before making a purchase.
Prioritize the health and safety of all participants by being proactive and informed about potential allergen risks.
Supervising Children
Constant adult supervision is crucial when children are engaging with paint your own cookie kits, especially younger children. Small cookie decorations and edible glitter pose a potential choking hazard.
Ensure children understand that the paint (royal icing) is for decorating only and should not be consumed in large quantities. Emphasize that it’s a treat to be enjoyed after decorating.
Monitor the use of paintbrushes to prevent children from putting them in their mouths. Provide separate brushes for each color to avoid mixing and potential unwanted flavors.
Guide children in using food coloring responsibly, avoiding excessive amounts and ensuring they don’t ingest it directly. Explain the purpose of each component and safe handling practices.
Create a safe and enjoyable environment where creativity can flourish, but always prioritize the well-being and safety of the young artists involved.
Storage and Preservation
Proper storage in airtight containers preserves decorated cookies for up to a week, maintaining freshness and vibrant designs. Icing quality is best kept by storing unused portions sealed, preventing crusting.
Storing Decorated Cookies
Maintaining the quality of your beautifully painted cookies requires careful storage practices. Once the royal icing has completely set – typically overnight – the cookies should be placed in an airtight container. This prevents them from absorbing moisture and becoming soggy, which can ruin both the texture and the artwork.
Layering the cookies between sheets of parchment or wax paper within the container is highly recommended. This prevents the designs from sticking together and ensures each cookie remains pristine. Store the container at room temperature, away from direct sunlight and heat sources.
Properly stored, your Paint Your Own Cookies can remain fresh and visually appealing for up to a week. Beyond that, while still safe to eat, the icing may begin to lose some of its vibrancy and the cookie itself might become slightly less crisp.
Maintaining Icing Quality
Royal icing, the cornerstone of Paint Your Own Cookies, requires specific handling to stay smooth and workable. To prevent crusting during decorating sessions, consistently cover the icing bowl with a damp cloth or plastic wrap, pressing it directly onto the surface. This minimizes air exposure.
If the icing does begin to thicken, add a tiny drop of water at a time, mixing thoroughly after each addition, until the desired consistency is reached. Avoid over-thinning, as this can make the icing runny and difficult to control.
Prepared icing can be stored in an airtight container at room temperature for up to two days. Stir gently before use, and re-cover immediately to maintain its optimal texture for painting and detailing.